Selenium for Beginners, Experts
Cool
Saturday, 21 March 2015
Setup Selenium Project
The below steps guide you on how to use maven to configure/download Selenium
and Testng automatically from maven clean installation, ofcourse, after
modifying project object model pom.xml file of maven.
------------------------------------------------------------------------------
1) Download JRE, JDK, Eclipse for Enterprise Edition EE


2) Set environment variables below

JAVA_HOME = C:\Program Files\Java\jre1.8.0_31\
JRE_HOME  = C:\Program Files\Java\jdk1.8.0_40\

3) Download latest Maven binary .zip from www.maven.org onto a folder,
say, D:\Selenium\apache-maven-3.2.5

4) If you think, you are behind a proxy( working from office or office VPN),
Change the proxy settings of settings.xml from the below maven downloaded location.
say, D:\Selenium\apache-maven-3.2.5\conf

Setting up proxy to make maven work:
 <proxies>
    <!-- proxy
     | Specification for one proxy, to be used in connecting to the network.
     |-->
    <proxy>
      <id>optional</id>
      <active>true</active>
      <protocol>http</protocol>
      <username></username>   <!-- type user name -->
      <password></password>   <!-- type password -->
      <host></host> <!-- type proxy host name -->
      <port>80</port>
      <nonproxyhosts></nonproxyhosts> <b><!-- type host --></b>
    </proxy>

  </proxies>


5) Open notepad and Create a file named "pom.xml" in a seperate folder, Say,
D:\Selenium\MyProject. ( Myproject would also be your eclipse workspace).
and enter below xml code and save the xml in D:\Selenium\MyProject\pom.xml
Info: The dependencies mentioned below, have entries to download jars
from selenium and testng websites. you may specify more dependencies,
if you would like to download other open source jars or files or utilities
that might be helpful for your selenium automation projects.
<project xmlns:xsi="http://www.w3.org/2001/XMLSchema-instance" xmlns="http://maven.apache.org/POM/4.0.0" xsi:schemalocation="http://maven.apache.org/POM/4.0.0

http://maven.apache.org/xsd/maven-4.0.0.xsd">
        <modelversion>4.0.0</modelversion>
        <groupid>MySel20Proj</groupid>
        <artifactid>MySel20Proj</artifactid>
        <version>1.0</version>
        <dependencies>
            <dependency>
                <groupid>org.seleniumhq.selenium</groupid>
                <artifactid>selenium-java</artifactid>
                <version>2.45.0</version>
            </dependency>
  <dependency>
    <groupid>org.testng</groupid>
    <artifactid>testng</artifactid>
    <version>6.1.1</version>
    <scope>test</scope>
  </dependency>
        </dependencies>
</project>
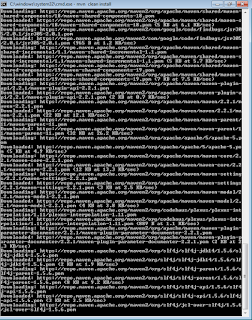
6) Open command prompt and navigate to the location where your POM.xml file is located. Type the below command and enter mvn clean install You will see below screen while clean install is done, it takes a while to download respective jars to download from internet.
--You will see below screen when installation is completed.--
7) Open Eclipse IDE and download maven plugin.8 ) Next we have to convert java projects created in eclipse that takes classpath as maven container.open command prompt, Navigate to your Java project folder, whereEnter below command:pom.xmlfile is placed.
mvn eclipse:eclipse
9) Open Eclipse and create a workspace
say, D:\Selenium\MyProject\
10) Create a project in your workspace,
say,D:\Selenium\MyProject\Test1
11)
Setting up .project file and .classpath in the newly created project:
Now navigate to D:\Selenium\MyProject\Test1\ and open .project file
make below two entries
<nature>org.maven.ide.eclipse.maven2Nature</nature>
<name>org.maven.ide.eclipse.maven2Builder</name>
and the whole project file looks like below :
<?xml version="1.0" encoding="UTF-8"?>
<projectDescription>
 <name>Test1</name>
 <comment></comment>
 <projects>
 </projects>
 <buildSpec>
  <buildCommand>
   <name>org.eclipse.jdt.core.javabuilder</name>
   <arguments>
   </arguments>
  </buildCommand>
  <buildCommand>
   <name>org.maven.ide.eclipse.maven2Builder</name>
   <arguments>
   </arguments>
  </buildCommand>
 </buildSpec>
 <natures>
  <nature>org.eclipse.jdt.core.javanature</nature>
  <nature>org.maven.ide.eclipse.maven2Nature</nature>
 </natures>
</projectDescription>
and your .classpath file in Test1 Project folder should be edited as below:
<?xml version="1.0" encoding="UTF-8"?>
<classpath>
 <classpathentry kind="src" output="target/classes" path="src/main/java"/>
 <classpathentry excluding="**" kind="src" output="target/classes" path="src/main/resources/config"/>
 <classpathentry excluding="**" kind="src" output="target/classes" path="src/main/resources/photos"/>
 <classpathentry kind="src" output="target/test-classes" path="src/test/java"/>
 <classpathentry excluding="**" kind="src" output="target/test-classes" path="src/test/resources"/>
 <classpathentry kind="con" path="org.eclipse.jdt.launching.JRE_CONTAINER/org.eclipse.jdt.internal.debug.ui.launcher.StandardVMType/JavaSE-1.6"/>
 <classpathentry kind="con" path="org.maven.ide.eclipse.MAVEN2_CLASSPATH_CONTAINER"/>
 <classpathentry kind="output" path="target/classes"/>
</classpath>
12) Create two folders like below screenshot in your project,
Say, src/main/java
and
src/main/resources
Subscribe to:
Posts (Atom)


